- 4
- 퓨처마츠
- 조회 수 1865
안녕하세요..! 웹호스팅의 한계점일 수 있는(?) 미디어위키 시각편집기를 웹호스팅에서 쓰는 방법을 알려드릴게요
준비물
1. VisualEditor가 호스팅폴더의 미디어위키 확장기능폴더에 있어야 함
2. Heroku 계정
3. git bash
4. Heroku CLI
5. notepad++(권장)
방법
우선 시각편집기를 확장기능 폴더에 넣으세요 그리고 http://heroku.com 에서 회원가입을 하시는데 Primary development language 에서 Node.js선택 후 가입한 뒤 cmd켜신후
heroku login
하시면 이메일 물어보는데 가입하신 이메일 입력하면 비번도 물어봐요 그러면 비번도 물어보는데 입력하면 로그인되었다고 뜹니다. 그러면 cmd 끄시고
git bash키세요 그리고
git config --global user.name "(원하는 이름)"
하시고
git config --global user.email (원하는 메일주소)
하세요 그리고 C:\에 folder1 과 folder2를 만드신후 git bash에서
cd C:\folder1
하시고
git clone https://gerrit.wikimedia.org/r/p/mediawiki/services/parsoid.git
하세요
그다음 C:\folder1\parsoid 들어가셔서 .gitignore라는 것을 notepad++로 여시고 11번째 줄인 config.yaml라는 것을 지우세요 그리고 config.example.yaml을 notepad++로 여시고 uri "(localhost뭐시기)"에서 괄호 쳐져있는것을 http(혹은 https)://(위키주소)/api.php
라고 입력하시는데 꼭 위키엔진이 있는 디렉토리여야 합니다. 그리고 저장을 하는데 이름을 config.yaml로 저장 하시고
localsettings.example.js 도 마찬가지로 uri를 수정하신뒤 이름을 localsettings.js 로 저장 하세요
이제 다시 git bash로 돌아와서
cd .. (2번 해주세요)
하시고
cd c:\folder2
하신뒤
heroku create (원하는 이름)
하시고 heroku사이트로 가셔서 아까 만든 앱을 찾습니다.
그리고 설정탭에 들어가서 Config Vars 를 찾으면
Reveal Config Vars 라고 적힌 버튼을 누르고
key: NODE_ENV VALUE: production 을 추가하시고 key: Buildpack VALUE: nodejs 도 추가 해주세요 그리고 폴더1에 있던 parsoid폴더 안에있는 파일 전부를 folder2에 복사해주세요(parsoid 폴더 채로 말고 폴더 내부 파일만) 그리고 git bash로 돌아와서
git init
하시고
git add .
하시고
git commit
하시면 어떤 파일이 뜨는데 그냥 무시 하시고
heroku git:remote -a (heroku앱 이름)
하시고
git commit -m "initial commit"
하시고
git push heroku master
하시면 뭐가 쫙 뜨면서 완료 됩니다 그러면 마지막으로
heroku ps:scale web=1
하시고 http://(heroku 앱이름).herokuapp.com 들어가셨을때 Welcome to the Parsoid web service 뜨면 정상이고 애플리케이션 오류가 뜬다면 처음부터 다시 해야합니다 :(
이제 완벽하게 되었다면 위키폴더의 Localsettings.php만 수정 하면 끝납니다..!
Localsettings.php를 여시고 맨아래 wf뭐시기 맨아래에
wfLoadExtension( 'VisualEditor' );
//Enable VisualEditor by default for everybody
$wgDefaultUserOptions['visualeditor-enable'] = 1;
// Optional: Set VisualEditor as the default for anonymous users
// otherwise they will have to switch to VE
// $wgDefaultUserOptions['visualeditor-editor'] = "visualeditor";
// Don't allow users to disable it
$wgHiddenPrefs[] = 'visualeditor-enable';
// OPTIONAL: Enable VisualEditor's experimental code features
#$wgDefaultUserOptions['visualeditor-enable-experimental'] = 1;
// Parsoid configuration
$wgVirtualRestConfig['modules']['parsoid'] = array(
// URL to the Parsoid instance
// Use port 8142 if you use the Debian package
// url must not end in a slash, otherwise it might give a 404 error
'url' => '(heroku 앱이름).herokuapp.com',
// Parsoid "domain", see below (optional)
'domain' => 'localhost',
// Parsoid "prefix", see below (optional)
'prefix' => '(원하시는 접두어)',
//If you run a private wiki then you have to set the following variable to true:
'forwardCookies' => true
);
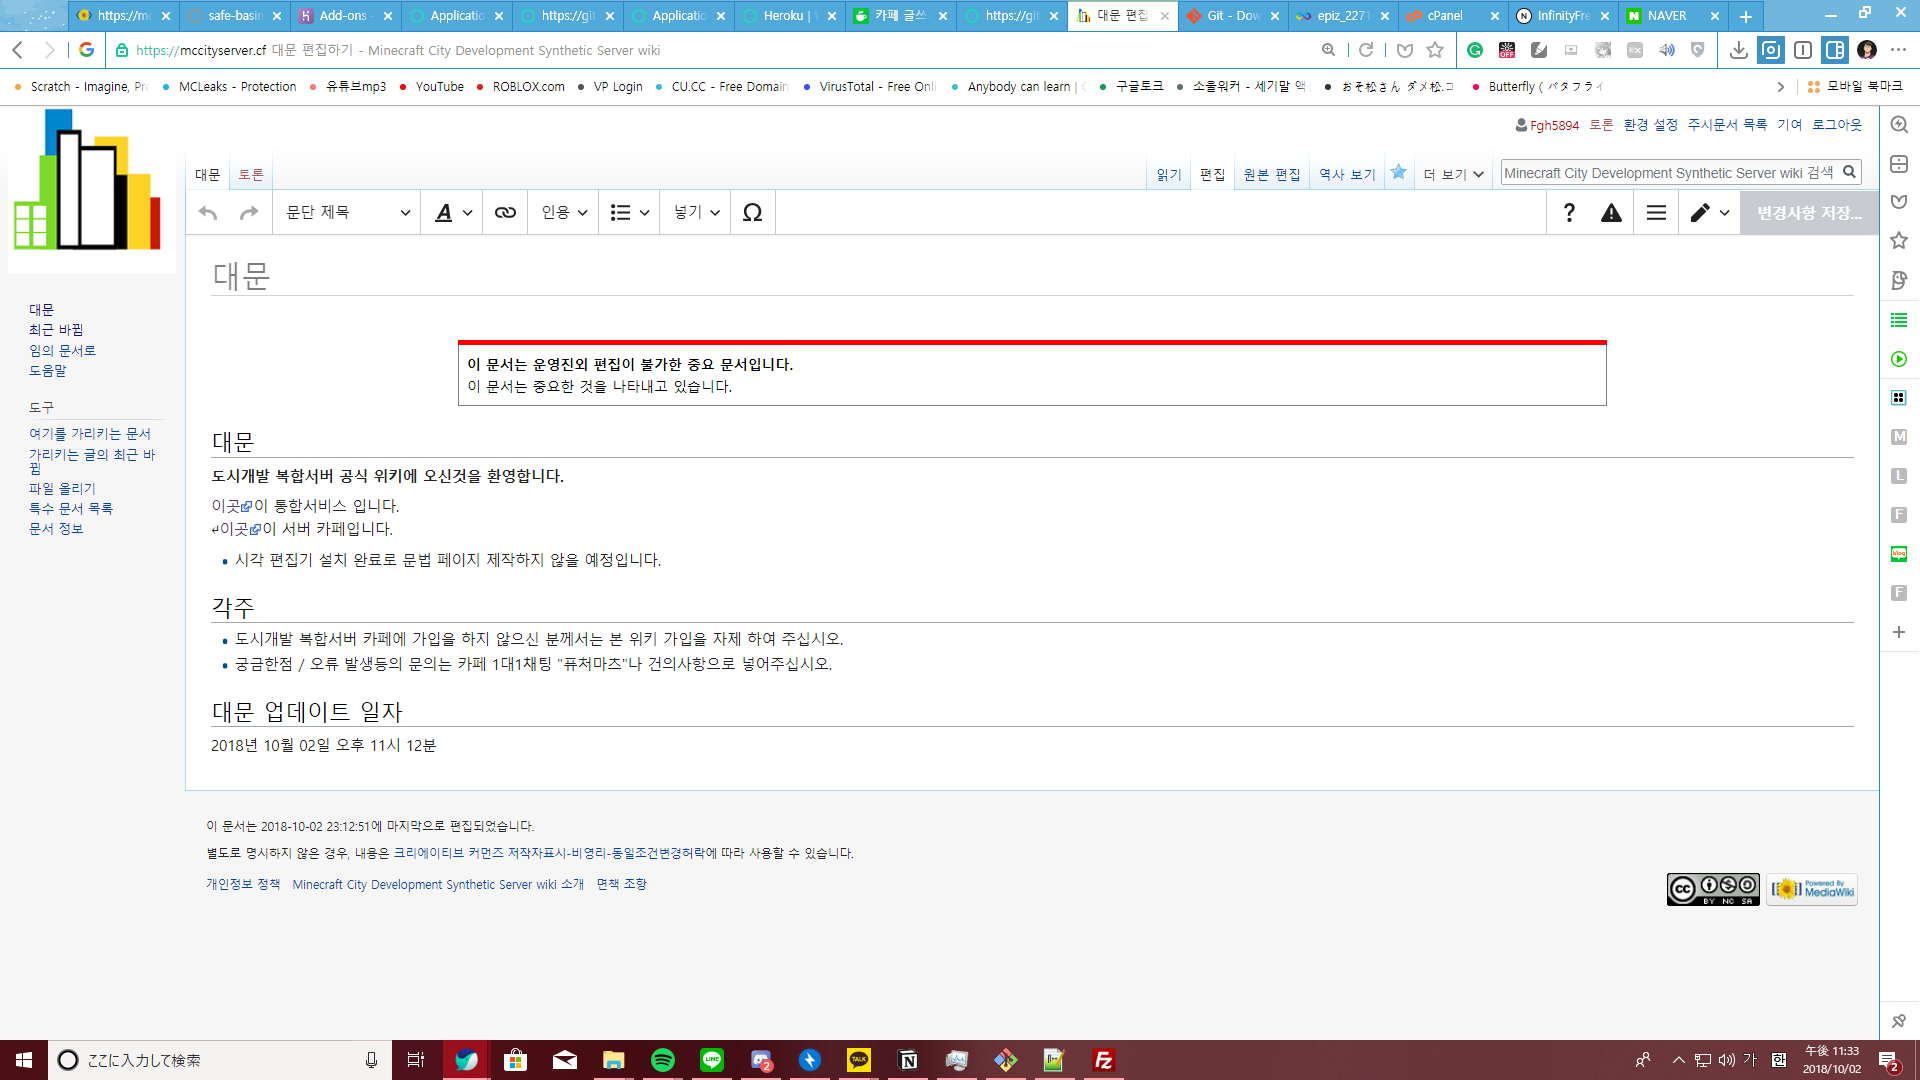
아래의 괄호의 내용을 수정해서 올리시면 아래 사진과 같이 잘 된답니다..!

이상으로 이 길고도 험한 것을 따라오신 여러분 수고 하셨습니다 :) 이것을 하고 나시면 엄청난 성취감이 들었어요..!
질문이나 안되는것이 있다면 댓글로 남겨주시기 바랍니다 감사합니다.
 포함 2명이 추천


앞으로도 시간 나실 때 위키와 관련된 팁을 올려주시면 정말 감사하겠습니다 ^^